Multi-Site Studies
Multi-site allows studies to conduct participant recruitment across various regions, leading to more diversified research outcomes.
In this article, we will guide you through the functionalities for managing your study across multiple sites, such as viewing the list of study sites, adding a new site, editing site details, and more.
In the context of the multi-site, all researchers associated with a study are given equal access to manage all its sites. This ensures effective collaboration and information sharing among the research team.
In the current version of the Multi-site, all study sites follow the same protocol.
Now, let's dive into a set of functionalities for managing your study across multiple sites:
Viewing the List of Study Sites
On the Basics page, scroll down to the Sites section. Here, you'll find a list of all your study's sites, with each
site displaying a unique ID, Name, and Location. The list is sorted in ascending order based on the site IDs, but you
can sort it alphabetically according to any column.
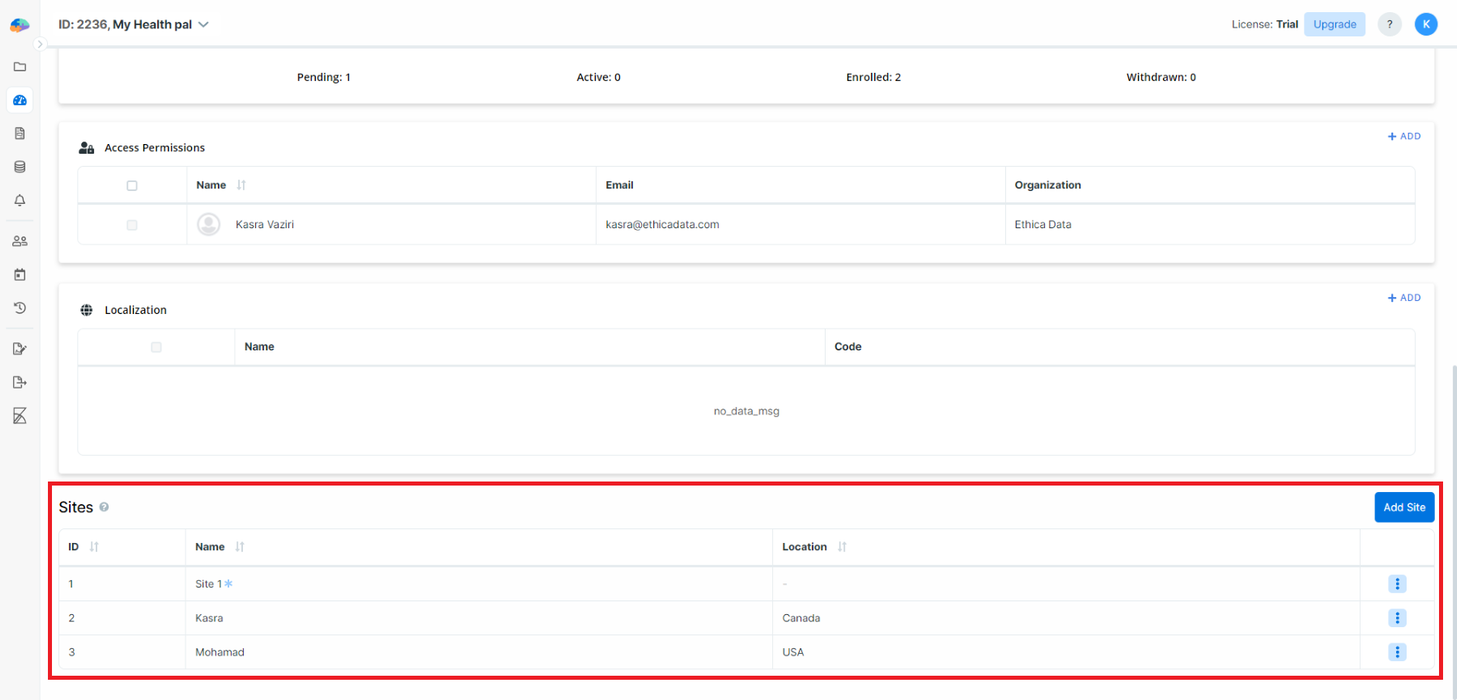
By default, all studies have only one site called Site 1. If your study does not use multiple sites, you can simply
keep Site 1 as the only site. In this case, you will not see the site selector option on any of the researcher
dashboard pages.
Adding a Site
In the Sites section of the Basics page, click on the Add Site button to add a new site. This action will trigger
a dialog box where you need to specify the Name and Location of the new site. After clicking Add, your new site
will be included in the study and appear at the end of the sites list.
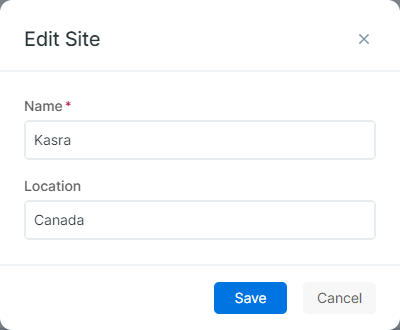
Editing a Site
Each site in your list has a menu (represented by three vertical dots) beside it. You can click on the Edit option
under this menu to edit the site's details. In the Edit Site dialog, you can update the Name and/or Location of
the site. Don't forget to click Save to confirm the changes.
Removing a Site
The menu next to each site also allows you to remove a site. When you want to remove a site, a Remove Confirmation
dialog will prompt you to affirm your action. Note that you can't remove a site that currently has associated
participants (either invited or joined).
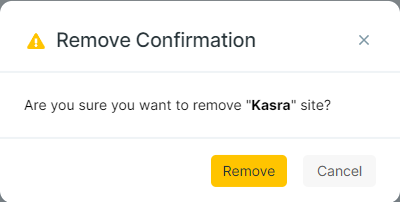
Keep in mind that you cannot remove the default site, named Site 1, from your study.
Switching Between Sites
If your study involves multiple sites, you can use the Site Selector to choose which site's data to view or export.
This selector is available at the top of every data-related page (like Beacons Mapping, Notifications,
Participation, Pending Invitations, Sessions, Audit Trail, Survey Responses, or Data Export).
The system will remember your selection until you log out. Also, any search query you conduct will be done within the data of the selected site.