Create a New Study
The first step of using Avicenna is to create a study. Studies are the main building blocks of Avicenna, as they represent your entire research project; you cannot use Avicenna for your research project without creating one study.
Your Studies
Avicenna allows you to be part of multiple studies as a researcher or own multiple studies as an owner. To see an
overview of all your studies, you can go to the My Studies page in your dashboard.
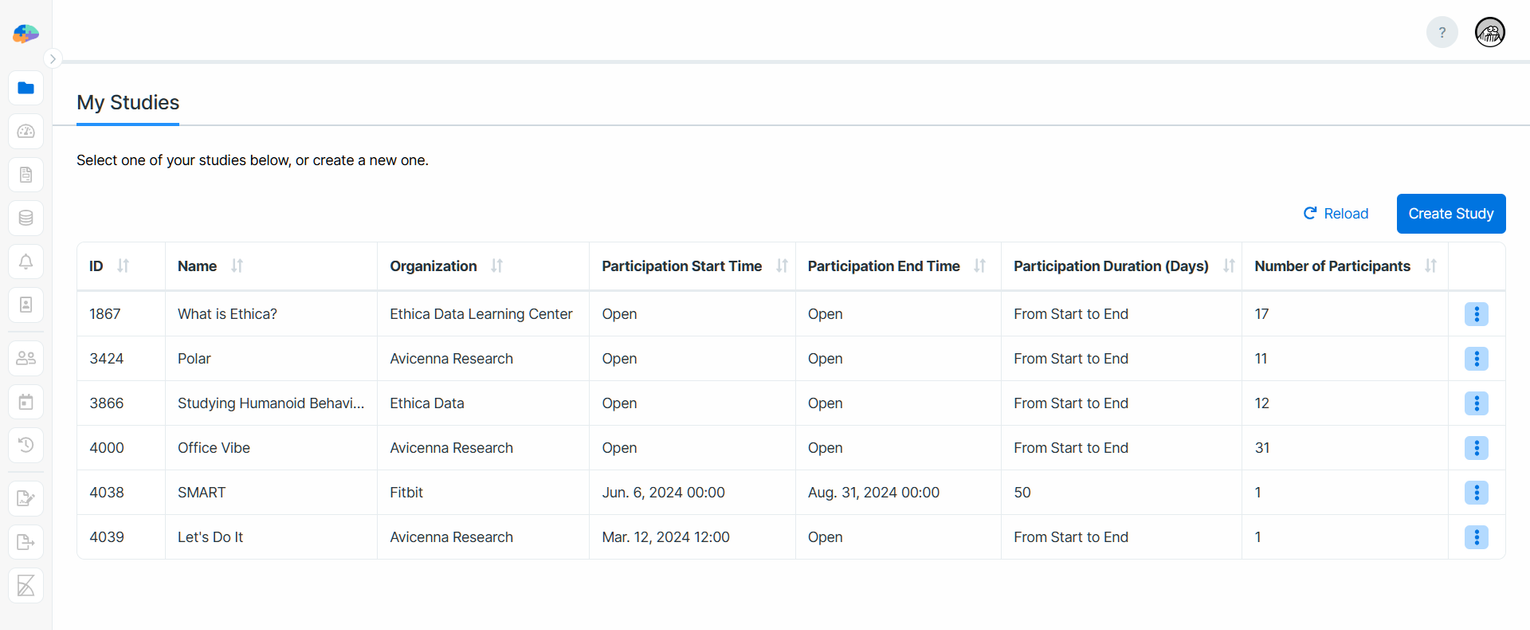
On that page, you can open a study by clicking on its row. You can also create new studies in two ways which we'll cover below.
Creating a New Study From Scratch
You can start a new study from scratch by clicking on the Create Study button on the My Studies page.
This will open the Create a New Study dialog. Click on Let's Go to proceed. On the next page, you can enter the
initial information about your study. Below, we will walk you through these steps. At every step, make sure you enter a
valid response. When you do so, the checkmark next to the box will be enabled. You can then press the checkmark button,
or the Enter key on your keyboard to go to the next field.
You can also move between completed steps by clicking on their titles.
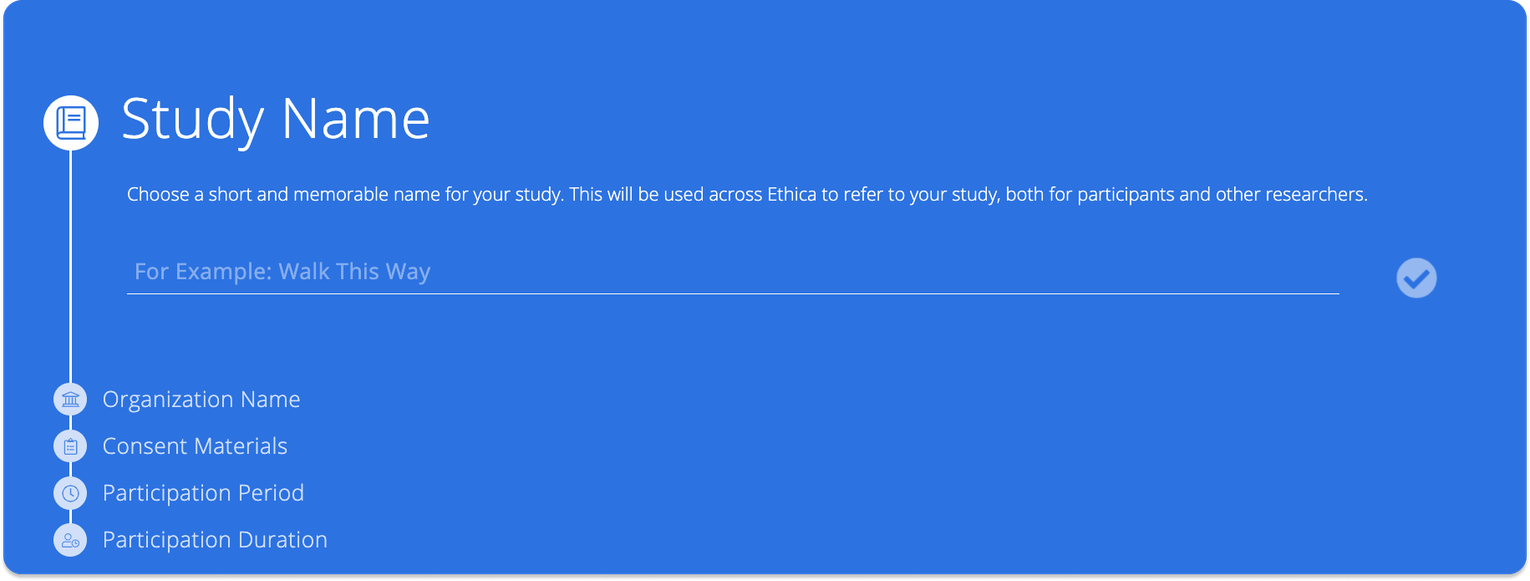
Study Name
The first step is to provide a name for your study. The name should be short, memorable, and concise. It will be used in both the researcher dashboard and the participant apps to refer to this study.
Organization Name
Next, specify the name of the organization conducting this study, which defaults to your affiliated institution but can be changed if preferred.
Consent Materials
Next, you should enter the content of the participant consent form for your study. This is typically the content that is approved by your institution's review board as part of your study's ethics review board application. This content is shown to participants during registration before they join your study. Participants are expected to read and accept this content before joining the study. Specifically, you need to ensure your consent form covers the following:
- What is the purpose of the study?
- What potential risks or benefits might participants experience?
- How will participant data be handled and who will have access to the data?
- How can participants contact the research team if needed?
- What are the steps for withdrawal from the study?
If you plan to meet with each participant in person and ask them
to sign a paper consent form, then the content written here should be primarily informative. In this case, you can just
include the information you want participants to access easily.
If you aren't collecting signed paper consent forms from participants,
you should include the full consent form materials here and inform participants
that by registering in the study, they are providing implicit consent.
You can format your content using the available controls at the top of the input area.
Participation Period
At this stage, you determine how Avicenna should calculate the participation period by setting the start and end dates/times. As participants join your study, Avicenna automatically schedules the beginning and end of their participation. We explain this in more detail in the Participation Period.
Participation Duration
As the final step of creating a new study, you need to determine how many days each participant will take part in the study.
Finalize
After adjusting the participation timeline in the last steps, you can click on the Start button to create your study.
This might take a few seconds, during which Avicenna will set up a database for your study.
After this, you will be redirected to your study's homepage (Basics page) in your
researcher dashboard.
Duplicating a Study
While creating a study from scratch is what you probably need most of the time, Avicenna offers an alternative method to create studies quickly and easily.
If you're the owner of a study and need to create a similar study protocol/schema (not the participants or their data)
in a new study, you can duplicate the existing one. To do this, go to the My Studies page, click on the 3-dot menu
next to the study, and choose Duplicate.
After confirming the action, Avicenna will begin duplicating the study in the background. Upon completion or if the process fails for any reason, you'll receive an email about the result.
These parts of your study will be duplicated:
- Basic settings
- Localizations and translations
- Sites
- Activities (the last version only)
- Data sources excluding beacons mapping
- Notification templates and their links to the activities
- Researchers, roles, and permissions
Also, all references to survey questions in criteria and question placeholders will be updated based on the new duplicated survey IDs.
The new study will have a trial license. Similarly, some configurations like SMS and chat (televisit) will not be copied to the new study. Please contact us at support@avicennaresearch.com if you need to change those.
Basics Page
The Basics page displays a few basic configurations for your study and allows you to modify them as needed:
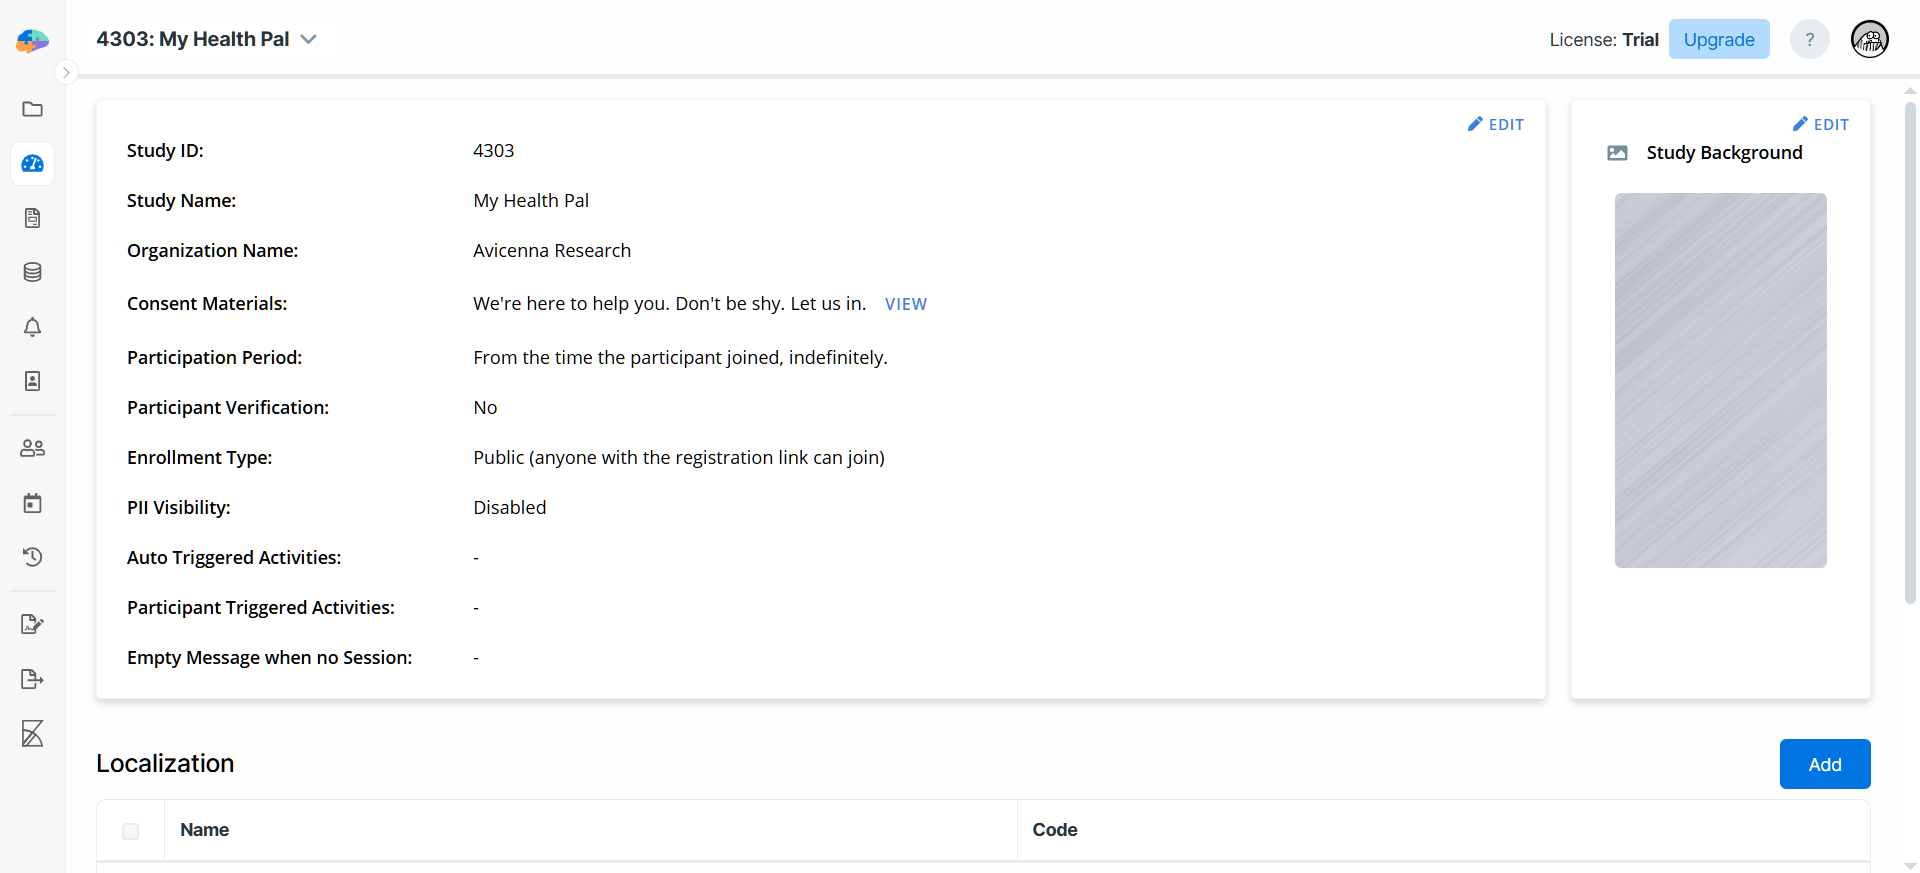
On this page, you can view your study's ID, its name, organization name, consent materials, and participation timeline you configured during study creation.
Study ID
Avicenna assigns a unique ID to each study, helping you to distinguish it from other studies on the Avicenna platform. For example, in the shown image above, ID 1302 is assigned to our demo study. You must share this study ID with your participants depending on your preferred enrollment method. You can read more about this in the Enrollment section.
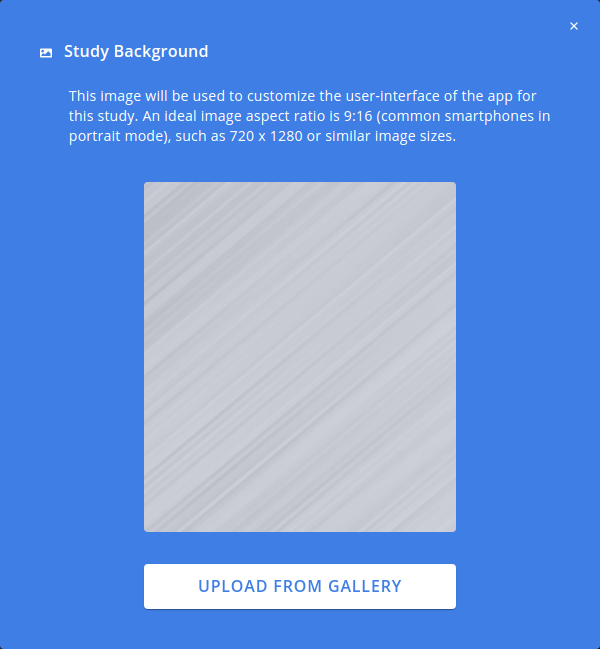
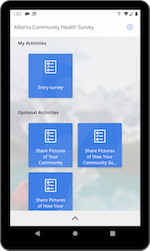
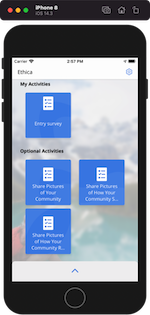
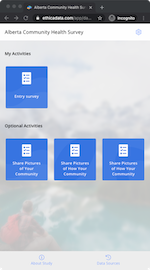
Study Background
The Study Background option allows you to customize the appearance and feel of the Avicenna app and website for your
study. The selected image will appear as the background in your study on the participant apps and
registration pages. Below is an example of a customized background image:
 |  |  |
To change your study background, go to the Basics page, click the Edit button in the top-right of the Study
Background section. This will open a dialog where you can select a background image. An ideal image aspect ratio is
9:16 (a portrait aspect ratio common among smartphones), such as 720 x 1280.